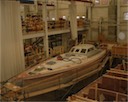
The deck is built entirely by hand. Like the hull, frames are built that capture the shape of the deck and the cockpit (with all it’s little coamings, turns and facets). Then the frames are planked and finished to produce a mold. Layers of fiberglass, then core (thought not in the high stress areas), then more fiberglass, are built over a series of days, allowing each layer to dry and cure before the next is applied. Then the deck is lifted out of the mold, flipped over while dangling from a crane (a nervous moment!), and eventually transported to the main building to be mated with the hull.
The process with the hard dodger is essentially the same, but it’s much smaller and has fewer facets.
The most recent pictures show the painted deck with the non-skid applied. The glossy areas at the edges, around the hatches and around hardware show where the non-skid was not applied.

Non-skid on the transom – May 2008

Non-skid on the house top – May 2008

Non-skid on the side deck – May 2008

Non skid on the foredeck – May 2008

View from above – Feb 2008

Jim and JB check the wiring channels – Feb 2008

Profile from port – Feb 2008

The dodger has landed – Feb 2008

Almost there – Feb 2008

Sky hook lowers it down – Feb 2008

Fairing the inside of the dodger before applying the core – Oct 2007

Cockpit portion of deck prior to lifting onto the hull – Oct 2007

Finished deck about to lifted onto the hull – Oct 2007

Laying up the dodger – Oct 2007

Fairing the deck – Oct 2007

Deck looking forward with hole in future location of starboard transom locker – Oct 2007

Right side up and back in the shed – Oct 2007

Flipping the deck – Oct 2007

Lifting the deck out of the mold – Oct 2007

Core is applied to the outer skin on the deck before laying up the inner skin – Sep 2007

Initial layers of deck lay up – Sep 2007

Hard dodger mold – Aug 2007

Cockpit area of deck mold – Note that it’s upside down – Jul 2007

Finished deck mold – Jun 2007

Planked deck mold – Jun 2007

Framing for the deck mold – May 2007


